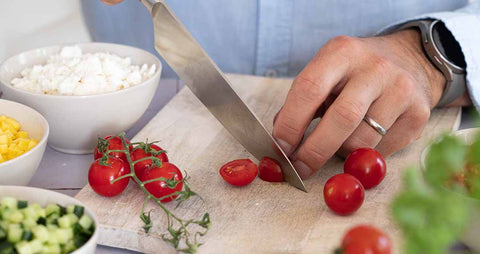
Everyone knows that a knife should be sharp, but a surprising number of people still have dull knives in their kitchen. A sharp knife reduces the risk of injury, and if you do cut yourself with a sharp kitchen knife, the wound will heal faster. In addition, you get a finer cut in the ingredients. Above all, cooking is much more fun with a knife that cuts the tomatoes instead of making tomato paste. The Tormek T-1 allows you to sharpen your knives yourself, in your own kitchen!
Advantages of using the Tormek T-1
When you sharpen a knife with the Tormek T-1 Kitchen Knife Sharpener, you get a precise and repeatable result that is very difficult to achieve by hand on a sharpening stone and often requires years of experience to master. And even then, the result might not be perfect every time. The Tormek T-1 has a patented guide where you set the angle that suits your knife. The guide also maintains a constant angle along the entire blade, so you get a completely even and fine grinded edge.
The fine-grained diamond grinding wheel has 600 grit and will sharpen knives of all different steels. Even ceramic knives will be sharper than new. And because the grinding wheel rotates at such low speed, you don't have to worry about any heat build-up that could damage your fine knives. A professional sharpening that is simply gentle on the knives!
A different result
When you sharpen a steel knife blade, something called a burr forms. It appears as a slightly saw-toothed bump on the opposite side of the sharpened blade when you have removed all the bumps and created a new edge. It is important to sharpen the knife equally on both sides, and to grind a burr along the entire blade. To the untrained sharpener, the knife may now appear sharp, but it is the burr that becomes like a microscopic sawtooth and can therefore be perceived as having an extra bite. But if you use a knife with the burr remaining, the knife will not give a clean cut, and it will become dull again very quickly. This is why you have to remove the burr after sharpening. The Tormek T-1 has a composite honing wheel with integrated polishing that quickly removes the burr after sharpening and polishes the grinding phase for maximum sharpness. In addition, you can maintain your knives on the sharpening wheel between sharpenings, so your knives stay sharp longer.
Preparations - sharpen your chef knives like a proffessional
Before you start sharpening your knife, it is a good idea to do some preparation. Make sure the knife you are going to sharpen is clean and dry, and that it has the right dimensions to sharpen with your Tormek T-1. Make sure the knife sharpening machine is clean and that the magnet on the guide does not have too many steel particles from previous sharpenings. Make sure you have good lighting so you can see what you are doing.
Step-by-step guide: how to sharpen your knife with Tormek T-1
Sharpening your knife on the Tormek T-1 is done in three steps - 1: Set the angle, 2: Sharpen the knife on the diamond grinding wheel equally on both sides until you have a burr along the entire blade, 3: Remove the burr and polish the edge of your knife. Then, of course, you can break each step down into smaller components - what angle should I sharpen my knife at? How do I know when I have finished sharpening? What is a burr and how do I know if I have it? How do I remove the burr? There are many questions, so we take the chance to explain the sharpening process in more detail.
- Place the machine on a stable surface, make sure the power switch is off, and plug the machine into an electrical outlet if it is not already plugged in.
- Loosen the knob on the guide and set the desired grinding angle. 15 degrees is generally a good angle for a standard chef's knife. Lock the grinding angle by locking the knob on the guide again. If you're not sure what angle to use, you can also try the Tormek marker method.
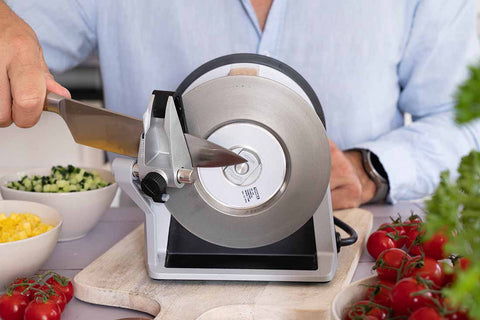
- Turn on the power switch and insert the knife into the guide without touching the grinding wheel.
- Once the knife is all the way into the guide, bring it down towards the diamond grinding wheel and towards you. Move the knife back and forth, always in contact with the grinding wheel. Keep a light pressure, as if you were cutting a tomato with a really sharp knife and follow the shape of the blade.
- Continue sharpening like this until you can feel a burr on the opposite side of the edge you sharpened, all along the blade.
- It is time to sharpen the other side of the knife. To do so insert the knife from the other side of the guide and sharpen the knife equally on this side.
- Check that you have sharpened a burr on this side as well, along the entire blade.

Now it's time to hone away the burr and polish the knife. Here it is important that the honing wheel always rotates away from the edge. If you put the knife against the blade as it rotates towards the edge, you risk cutting into the blade and destroying it.
- Make sure the composite honing wheel of the Tormek T-1 is rotating away from you.
- Hold the knife in a firm grip with one hand on the handle and the other hand over the blade, with the edge facing away from you.
- Place the knife blade flat on top of the honing wheel and slowly pull the knife towards you until the edge of the knife is at right angle on the honing wheel. You will hear a slight change in the sound, which will sound a little more scratchy.
- Keeping the same angle, move the knife back and forth across the honing wheel, again following the form of the knife. Here you can apply a little more pressure.
- Repeat on the other side of the blade. Spend a little extra time on this step, and alternate sides until all the burr is gone on both sides. The honing may require some practice to get it right.
- The honing and sharpening is complete when all the burr is gone. You can feel this if you drag the knife gently from heel to tip over a fingernail. If you feel any unevenness, you have not removed all the burr. If you find it uncomfortable to pull your newly sharpened knife against your nail, you can use an old credit card instead, or cut through a piece of paper and feel where it stops.
If you do not feel any unevenness anymore, you are all set. Gently wash the knife by hand with a little dish soap and you can start chopping, slicing, and dicing to your heart's content.
Clean the machine if necessary and return it to its place of honor in the kitchen.